Microcontroller projects
last updated: 2025-09-23
AVR, ESP, Pico, STM32
First this page was dedicated to AVR® controller from ATMEL®. The projects were in German and mostly Assembler. In meantime I often use Arduino so other controller that can directly be programmed in Arduino as Cortex-M4 (Teensy3) or ESP8266 (Wemos) are found in new projects. Even as my English isn't perfect I switched the language so more people are able to use the information on these pages (older projects are still in German).
SmartyReader: Reading Luxemburgish Smartmeter Port P1
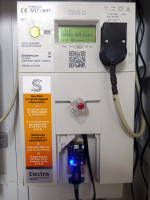 |
The P1 port of the Luxembourgish smartmeters (Smarty) is encrypted. Because of the spare information it was challenging to get the data (in 2017). Is use the MQTT protocoll to publish the data and a Raspi with Python to create a homepage with graphics. The µC board is a Wemos D1 mini board (ESP8266) to publish over Wifi or Ethernet or LoRa (LoRaWAN). Older versions (now archived) are a board with a Teensy 3.6 microcontroller reading 5 smartmeter and serial data from my rainwater tank with Ethernet and SD card (here) and a board reading the LED of the Smarty (here). |
Tips and tricks for Teensy (m32u4, M4), Wemos (ESP8266)
and WEMOS (ESP32) and hardware
| Tips and tricks for Teensy® USB Development Boards Using Timer1 and 3 in CTC mode, fast PWM, Teensy as I2C slave, ... |
Tips and tricks for ESP8266 (Wemos D1 mini (pro)) Using external antenna, SPIFFS, Wemos as I2C master and as MQTT publisher, ... |
Tips and tricks for ESP32 (MHETlLive) Not all pins are equal!! What pins should I use? |
| Arduino tips and tricks How to configure Arduino, UDEV rules... |
Audio tips and tricks From WAV or MP3 to C: Tips and tricks to play audio files on microcontroller (C/C++). |
Watchdog tips and tricks Feed the dog and use a watchdog reset counter... |
| ATmega328 low power and sleep tips and tricks Using an ATmega328P(B) Arduino chip with battery and LoRa for a long time. |
Arduino code snippets Arduino C/C++ code snippet that I use quite often and that can simplify life :). |
ESP NTP tips and tricks It's easy to use NTP (Network Time Protocol) time server with the ESP's. |
| Logic_level shifter tips and tricks Simple logic-level shifter can get unreliable over 100 kHz! |
TRIAC tips and tricks TRIACs are needed to regulate power. Refresh your knowledge about TRIACS. |
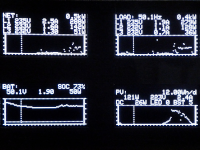
Solar_master: Monitor your PV panels
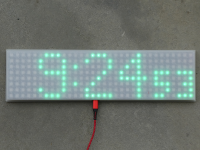
Neo clock 3 with 8x32 RGB LED matrix
ESPToolbox
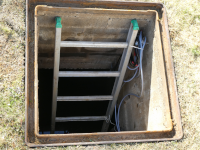
Measuring the rainwater-tank level
Growing station
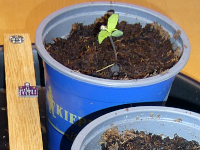 |
It's spring and it's time to grow my little organic plants for the garden. This will happen indoors, but this year there is not much light from outside, so I decided to buy an LED Grow Light SF2000Pro from Spider Farmer. This panel is efficient and can be controlled from outside. For the beginning I added an environmental sensor (Bosch BME680) to measure temperature, humidity, (pressure) and gas, and three light sensors TSL2561 measure the light in lux and control the grow light. After this I added a fan to avoid the temperature to rise to high under the LED. |
The NEO lamp
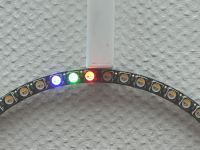
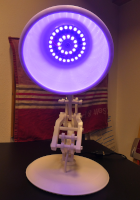
I found cool .stl files on thingiverse to print the well known pixar lamp luxo jr. I had still two spare neopixel rings from afafruit, waiting to be integrated in a project. And I needed a gift for XMas :). So here is the neo lamp. Using an ESP8266 with 16MB of Flash (WEMOS D1 mini pro) gives plenty of non used space to store a web page. |
 |
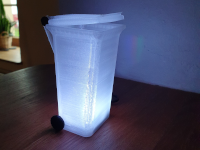
Waste bin reminder
Noctua fan control
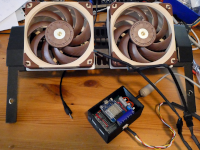
| My Victron Multiplus-II 48/8000/100 inverter are quite noisy. First I measured the noise with my Noise and Temperature Meter and monitored the noise with openHAB. To silence the Multiplus II, I added two quiet noctua fans per Multiplus. They get info about the DC current from an MQTT server and control the speed accordingly. The fans reduce the noise by 5-6 dBA. |
 |
Noise and Temperature Meter
EPROM Programmer for 27C512
NUM or CAPS lock indicator
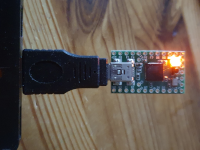 |
My new keyboard has no NUM lock LED. I have still a bunch unused Teensy 2.0. So let's use one to indicate if NUM or CAPS lock are activated. |
MQTT OLED Monitor
Direct Digital Synthesis DDS with microcontroller
Fitness Timer: Do your fitness!
NeoPixel Clock 2: with minimalistic design :)
Garden watering: Activate valves per MQTT over WiFi using an ESP8266
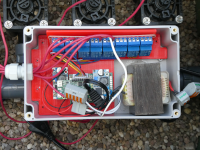
| In the last three summers we had months with no rain. Even my 10m³ rainwater tank did not suffice to provide water. But the vegetable garden must be regularly supplied with water. To save water, I use drip hoses, and to simplify my life, I have automated the control of the irrigation. An ESP8266 (WEMOS D1 mini pro V2 connects us with the network over WiFi and MQTT is used to give commands and get data. |
 |
Pico HAT: Connect your Raspi with the Pico through I²C
GHIDRA: Bare-metal ARM reverse engineering
The not completely useless box
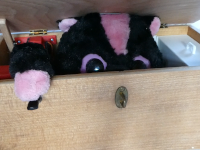 |
XMas again :). So here is the not completely useless box. All the material are recycled or were part of my basic electronics stock. The idea and parts of the code are from this page: https://www.labdomotic.com/2017/10/24/youtube-useless-box-fai-da-te/. To ensure that the box is not completely useless, it has a 3D printed compartment for jewellery (right corner). |
The NEO clock
ESP programmer
Oscilloscope clock with Teensy 3.6 or ESP32 and internet time
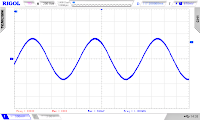
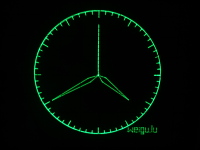
| Teensy 3.6 has an internal RTC (and crystal) and 2 DAC with 12 Bit. So no other hardware is needed then the Teensy-Board to create a nice oscilloscope clock. With an ESP8266 it synchronizes once a day with NTP. The new WEMOS32 (ESP32) has 2 DAC with 8 Bit and is able to get the time via Internet. All the magic is in the code. The Teensy is quick enough to calculate the needed points for the clock, so we can omit tables. The clock strokes are drawn from the circle line back and forth, so no ghost lines appear. Same thing for the second line and hands. 12 Bit gets a real sharp, steady nice image of the clock. The ESP32 needs tables so we can get a stable image. |
 |
Fine dust: Measuring particulate matter
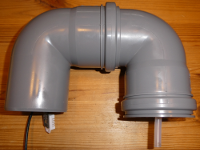 |
In Stuttgart/Germany there exists the OK Lab Stuttgart. There goal is to promote transparency development, open data and citizen science. There project luftdaten.info helps to measure fine dust with cheap but performant self-built sensors. Luftdaten.info generates a continuously updated particular matter map from the transmitted data. Fine dust becomes visible. Here we build our own (slightly modified) sensor. |
Creative-Lab IoT-board
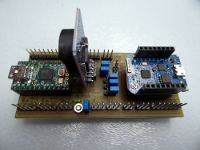
Everyone is talking about IoT and MQTT. MQTT is a publisher/subscriber protocol and it is quite simple to implement this protocol on two Wemos D1 mini boards (ESP8266) over Wifi. To read the impulse LEDs of my new five smartmeters (who aren't smart at all for the moment), I needed 5 microcontroller interrupts. This was difficult with only Wemos board, because there weren't enough interrupt pins. So I decided to combine the Teensy 2.0 board (mega32u4) with the Wemos-board.Features:
|
 |
Creative-lab space mining rover: Snyder 1
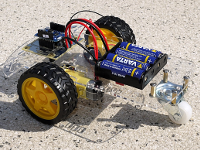 |
Der Rover lässt sich über das Wifi Netz mit einem PC oder Handy steuern. Er wurde für das creative-lab entwickelt und schon 35x auf dem Luxemburgischen Makerfest aufgebaut. The rover is WLAN controlled by a computer or phone. It was developed for the creative-lab. and was build 35 times on the 2 Luxemburgish Makerfest. |
Creative-Lab RT soldering station
| A cheap and compact SMD solder station built around a Teensy 2.0. It uses active soldering tips from Weller (RT series) including a heating element and a temperature sensor (standard 3.5 mm jack). The SMD soldering station has a very fast heat up time. | 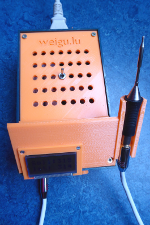 |
Efficient alarm clock with low electromagnetic radiation,
big display and music player
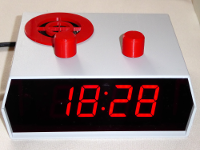 |
Yes I'm getting older! So I needed an alarm clock with bright LEDs to be seen in the night without glasses. Features of the clock:
|
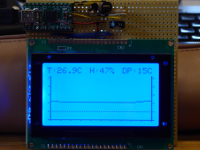
Arduino libraries for NT7534/SSD1322 in parallel mode or with I2C
| Arduino libraries for monochrome displays with an NT7534 or SSD1322 chip in parallel mode or over I2C. GTK-281 with NT7534 in parallel mode GTK-281 with NT7534 over I2C OLED with SSD1322 over I2C |
 |
Archived Projects: No Longer Maintained
Kleine USB-Bibliothek für ATMEL®-USB-AVRs
Die Kleine USB-Bibliothek in Bascom, C und Assembler wurde erweitert. Sie unterstützt nun die Controller: ATmega32u4, ATmega32u2, AT90USB162 und AT90USB1287, und kann leicht an andere Controller angepasst werden. Interessante und kostengünstige Boards um die Bibliothek zu nutzen sind zum Beispiel das Entwicklungsboard AT90USBKEY von ATMEL mit dem AT90USB1287 und das Mikrocontroller-Board Teensy 2.0 mit dem ATmega32u4. Die neue Version der Bibliothek lässt sich jetzt besonders leicht einbinden und programmieren. Die Bibliothek existiert in den zwei Varianten: HID (Datentransfer, Tastatur, Maus) und VENDOR (schneller Datentransfer, USB-EIA232).
Kleine USB-HID-BibliothekDie HID-Klasse ermöglicht eine Kommunikation unter Windows ohne spezifische Treiber! Die Übertragungsgeschwindigkeit (64 kByte/s) reicht für die meisten Anwendungen. Für den Datentransfer stehen zwei Endpunkte (Buffer) mit je 64 Byte zur Verfügung, die in festen Zeitabständen (1ms, Interrupt-Transfers) abgefragt werden. Es stehen zusätzlich zur normalen Datenkommunikations-Firmware auch Beispielprogramme zur Emulation einer Maus oder einer Tastatur zur Verfügung. |
 |
Kleine (schnelle) USB-VENDOR-BibliothekWill man größere Datenmengen schneller (bis 1216 kByte/s) übertragen, so kann man Bulk-Transfers nutzen. Allerdings ist die Bus-Bandbreite nicht garantiert, so dass diese Lösung für zeitkritische Anwendungen nicht geeignet ist. Am Bus sollten nicht zu viele Geräte angeschlossen sein. Für die Bulk-Transfers wird eine VENDOR-Klasse (herstellerspezifische Klasse) genutzt. Auch hier stehen zwei Endpunkte (Buffer) mit je 64 Byte zur Verfügung. Die Bibliothek kann aber leicht auf bis zu 6 Endpunkte erweitert werden. Die Bibliothek benötigt Treiber unter Windows. Der Zugriff erfolgt über die "libusb" sowohl unter Linux, wie auch unter Windows. Zusätzlich zur normalen Datenkommunikations-Firmware gibt es auch eine experimentelle Firmware zur Emulation einer seriellen Schnittstelle (EIA232). |
 |
Thermostat hacks
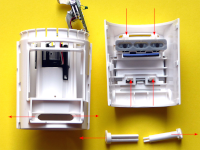 |
Back in 2010 we used HR20 thermostats from Honeywell (Rondostat) for a school project. They contained an ATmega169 controller from Atmel, and a team from microcontroller.net hacked the thermostat and published the results (in German). Here we will reprogram the thermostat with Arduino and add Lora radio functions |
LeafCANlog
| LeafCANlog is a CAN bus (OBD2) logger and display for the EV Nissan Leaf. It's build around an AT90CAN128 and uses a VDrive2 (FTDI) to log on USB-Sticks. | 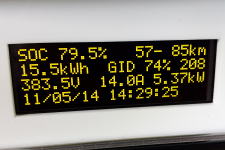 |
AVR experiments board MICES2
NEW! Convert your MICES2 board to Arduino
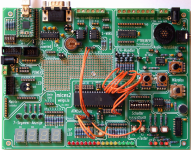 |
Low-Cost-Experimentierboard für AVR-Controller mit folgenden Eigenschaften:
|
Selbstbau USB Programmieradapter
| Unter Windows 7-10 nutzt man besser ein Teensy-Board mit einem ATmega32u4, das mit Software aus dem Lufa-Projekt von Dean Camera programmiert wurde. | 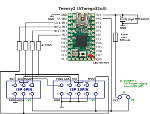 |
DIY cellphone hacks
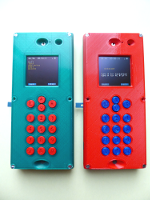 |
After showing an article of a DIY cellphone in the German MAKE journal to my eldest girl, we had to build two of them. Soldering was no problem with my new RT soldering station. The purchased LCD Displays where of very poor quality (the PCBs were too thin and bended, and so the display had bad contact). We decided to tweak the phone an use an 128*128 OLED Display. The housing is printed with PLA. The arduino file had to be adapted. |
CO22 "The mobile measurement station"
Teensylogger
SA1200p (CO2 device) hacks
First trials with STM32 microcontroller
USBammeter
| Das USBammeter misst Spannung, Strom und Leistung am USB-Anschluss und gibt die Daten über ein LCD-Display und zusätzlich über die serielle Schnittstelle aus. | 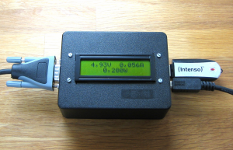 |
