Microcontroller projects
Measuring the level in a rainwater tank with 2 different sensors
last updated: 2025-04-24
Quick links
- Intro
- Ultrasonic sensor MB7060 XL-MaxSonar-WR
- Solutions and improvements
- Device to test the MB7060 ultrasonic sensor
- Hydrostatic pressure sensor ALS-MPM-2F
- Circuit with Teensy 3.6, Ethernet and SD card
- Interesting links
- Downloads
Intro
Again no rain for 8 weeks. Climate change should encourage us to take better care of our water. To do this, we need to know our water reserves. The water level of a rainwater tank is measured here with an ultrasonic sensor (XL-MaxSonar-WR MB7060) and a hydrostatic pressure sensor (ALS-MPM-2F).
Since 1999 I have had a round concrete rainwater tank (diameter 2.55m) which is one metre underground. It holds 10000 litres. Since 1999 my measuring devices fail regularly. This is because the environment in the tank is very hostile to electronics. Sooner or later, the high humidity destroys the plug connections. Over the years, I have tried to make the connections less vulnerable. Here my current solution.
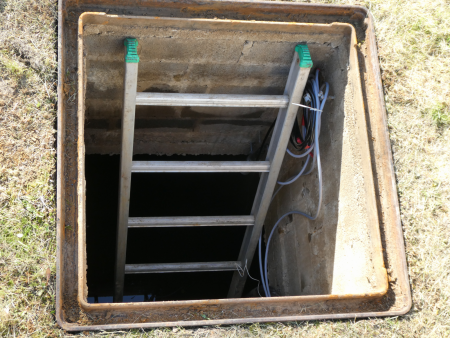
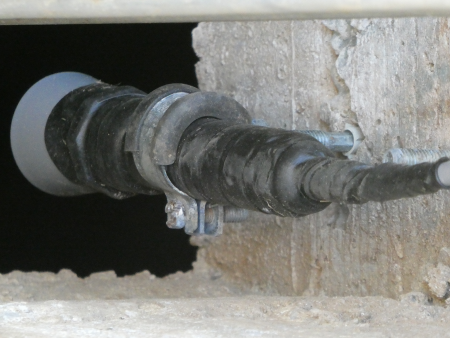
Ultrasonic sensor MB7060 XL-MaxSonar-WR
I use the ultrasonic sensor MB7060 from MaxBotix. This sensor is not cheap, but it has real-time auto calibration and noise rejection, a precise narrow beam and a robust, low cost IP67 housing. It provides range information from 20 cm up to 765 cm for the nearest detectable target at 1-centimetre resolution with a speed of 10Hz, and pulse-width, analog voltage, and RS232 serial outputs.
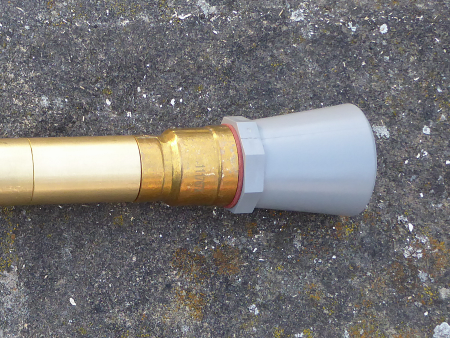
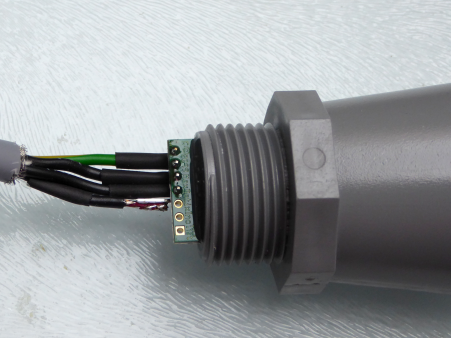
I use a serial connection. For this I need at least 3 pins of 7. I use 4 pins: Pin4 RX (not mandatory), Pin5 TX, V+ (3-5,5 V) and GND. Pin 1 must be left open or high for serial communication.
Serial connection
The RX-Pin (Pin4) is internally pulled high. If Pin4 is left unconnected (high), the sensor will continually measure the range. If Pin4 is held low the sensor will stop ranging. I will use this pin to command a range reading. For this it must be high for a minimum of 20 µs.
On the TX-Pin (Pin5) we get the serial stream with a baud rate of 9600 bit/s, 8 bits, no parity, with one stop bit (8N1).
This stream is inverted! We can invert it by hardware (transistor) or in software if the microcontroller core supports this like the ESP series. The output is an ASCII capital “R”, followed by ASCII character digits representing the range in centimetres up to a maximum of 765 followed by a carriage return (`\r', 0x0C, ASCII 13).
Hardware
Even if the sensor works with 3 V, it is better to use it with 5 V to be more resilient to noise. I will use microcontroller that works with 3 V (Teensy 3.6). The 3 V level of RX is high enough for the sensor, but the incoming TX signal is too high and inverted. So I use a MOSFET 2N7000 (or 2N7002) to invert the signal and reduce it to 3 V:
Another possibility is to use only a voltage divider to reduce the voltage to 3 V.
If you use a 3 V microcontroller, this is not necessary, but the TX signal must be inverted in software.
Software
With a function
distance_cm = get_distance_mb7060_cm(PIN_MB7060_REQUEST);
we set the RX pin, get the ASCII data and return the distance in cm (unsigned int). In setup we need to initialise the serial port with:
Serial.begin(9600, SERIAL_8N1, SERIAL_FULL, 1, true); // init serial (true = invert)
The last parameter inverts the signal if true, so if we use hardware to invert the signal, we must set it to false.
The whole C function can be found further down the page in the programme of the MB7060 tester.
Solutions and improvements
In my last version, I thought I had resolved all my problems :). But again after 3 years the contacts were oxidised. The water entered the cable at the connector (red arrow) and found its way along the shielding of the cable to the sensor. Also my old cat5 cable from the sensor to the house made problems.
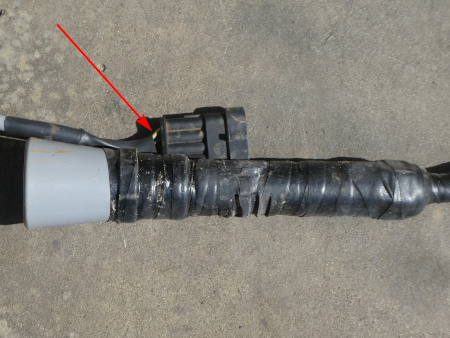
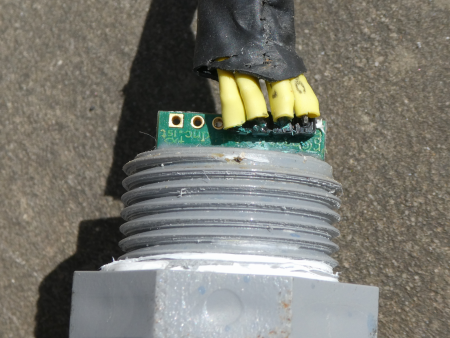
So here my improvements:
A second sensor:
The second sensor uses a different physical measuring principle. It helps to control the accuracy of the data.New cable:
I exchanged the cat5 cable with 2 Lapp Ölflex Classic 110 PVC signal cable 4x1 mm² (1119204).Better Heat Shrink Tubes:
The new tubes are from Wirefy. They are double walled, contain glue, have a 3:1 shrink ratio and are water tight.
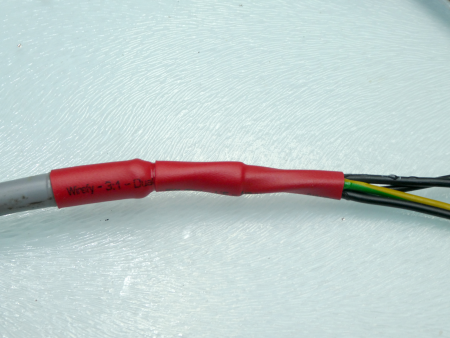
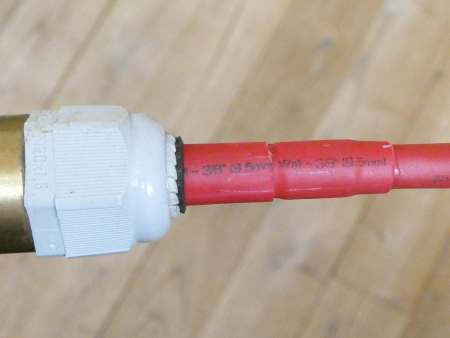
- Better connectors:
AMP Superseal 1.5 Series Connectors from Tyco Electronics (TE). These are water proof (IP 67). You find videos that explain how to crimp them.
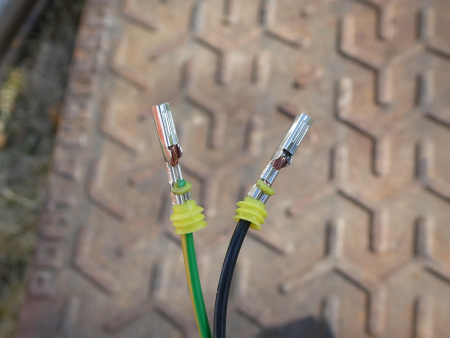
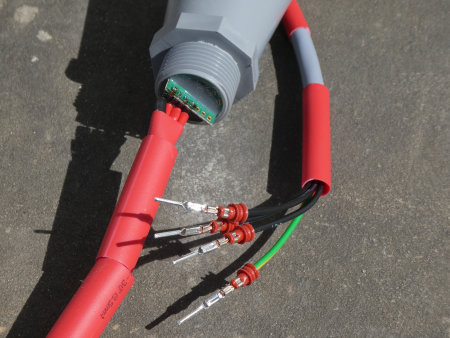
- Self vulcanising tape:
This helps to seal everything even better against water. - Spare sensor:
A second sensor with connector , tight and ready to replace a defective sensor.
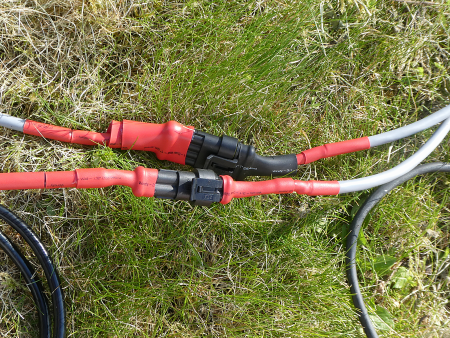
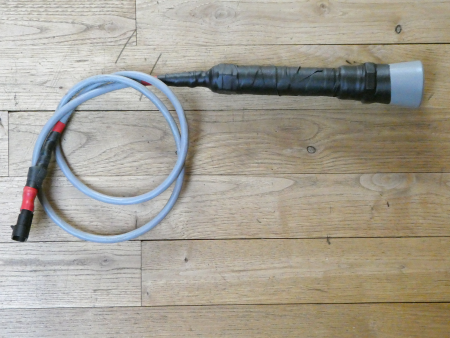
- A device to test the sensor:
To be sure the receiving circuit or the cable are not defective, I need a circuit for a quick check of the sensor.
Device to test the MB7060 ultrasonic sensor
Hardware
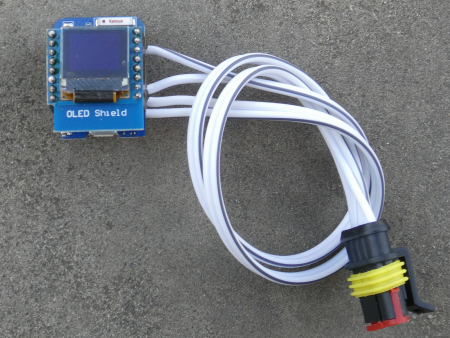
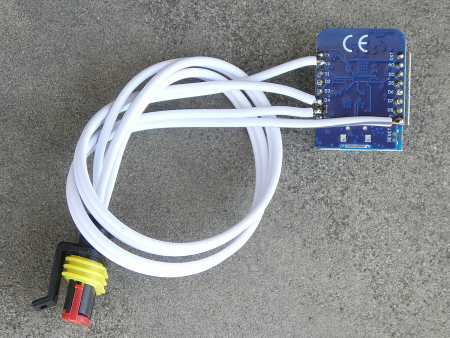
I need only a microcontroller and a display. I still have some WEMOS D1 mini Pro (ESP8266) and a D1 mini shield with a 0.66" OLED (I²C). I used an older Wemos board and an older shield with no buttons.
BOM
- WEMOS D1 mini Pro (V2.0)
- D1 mini 0.66" OLED shield with 2 I²C buttons (V2.1)
- AMP Superseal 1.5 Series Connector. (4 pole female)
Circuit
The circuit is very simple, as the sensor works also with 3 V. We could even omit the request pin and use only power and the serial line.
Software
We don't need special hardware, as we can invert the serial signal in software :).
/* mb7060_tester_ESP8266.ino
 * weigu.lu
 * Test ultrasonic sensor MB7060 from MaxBotix
 * serial 8N1 9600bit/s
 * Wemos D1 mini pro with OLED shield
 * Wemos GPIO 2 (D4) to Pin 4 (Rx) MB7060
 * Wemos GPIO 3 (RX) to Pin 5 (Tx) MB7060
 */

#include <Adafruit_GFX.h>
#include <Adafruit_SSD1306_Wemos_OLED.h>

#define OLED_RESET -1
Adafruit_SSD1306 display(OLED_RESET); // Create display object

const byte PIN_MB7060_REQUEST = D4; // GPIO 2 of D1 mini pro (also LED)

void setup() {
  Serial.begin(9600, SERIAL_8N1, SERIAL_FULL, 1, true);  // init serial (true = invert)
  pinMode(PIN_MB7060_REQUEST, OUTPUT);                   // init request_pin();
  init_display();
  delay(2000);
}

void loop() {
  display_distance_and_capacity();
  delay(1000);
}

void init_display() {
  display.begin(SSD1306_SWITCHCAPVCC, 0x3C);
  display.clearDisplay();
  display.setTextSize(1);
  display.setTextColor(WHITE);
  display.setCursor(4, 8);
  display.println("Distance: ");
  display.display();
}

unsigned int get_distance_mb7060_cm(byte data_req_pin) {
  String MB7060_data;
  char mb7060_data[6];
  unsigned int byte_counter = 0, distance_cm = 0;
  bool valid_data = true;
  digitalWrite(data_req_pin,LOW);         // Request serial data Off
  delay(10);
  digitalWrite(data_req_pin,HIGH);        // Request serial data On
  while (Serial.available() > 0) {        // Clear the buffer!
    Serial.read();
  }
  delay(200);                             // Wait for the message
  while ((Serial.available()) && (byte_counter < 5)) {
    mb7060_data[byte_counter] = Serial.read();
    if (mb7060_data[0] != 'R') {          // wrong data, clear buffer, get out
      distance_cm = 0;
      while (Serial.available() > 0) {
        Serial.read();
      }
      return 0;
    }
    byte_counter++;
  }
  for (byte i = 0; i<4; i++) {            // ignore carriage return
    valid_data = valid_data && isAlphaNumeric(mb7060_data[i]);
  }
  if (valid_data) {
    MB7060_data = String(mb7060_data);
    MB7060_data = MB7060_data.substring(1,4);
    distance_cm = MB7060_data.toInt();
  }
  digitalWrite(data_req_pin,LOW);         // Request serial data Off
  return (distance_cm);
}

void display_distance_and_capacity() {
  // inner diameter: 2,55m height about 2m, A = 5,107m²,
  unsigned int distance_cm, capacity_l;
  distance_cm = get_distance_mb7060_cm(PIN_MB7060_REQUEST);
  capacity_l = int(round(((201+3.5)-float(distance_cm))*51.07));
  display.clearDisplay();
  display.display();
  display.setCursor(4, 8);
  display.println("Distance: ");
  display.setCursor(20, 20);
  display.println(distance_cm);
  display.setCursor(4, 30);
  display.println("Capacity: ");
  display.setCursor(20, 40);
  display.println(capacity_l);
  display.display();
}
Hydrostatic pressure sensor ALS-MPM-2F
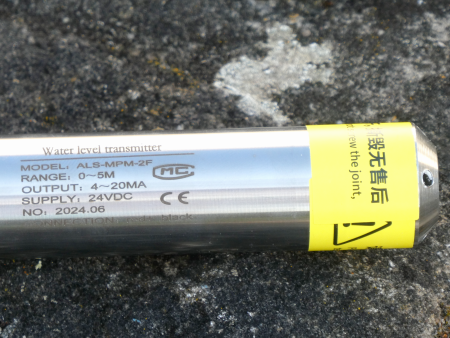
Just as my ultrasonic level sensor was defective, I read an article in the german MAKE 5/2024 about a hydrostatic pressure sensor. I then ordered such a sensor, labelled ALS-MPM-2F, to test it.
Hardware
The sensor needs a voltage source between 12 V and 36 V. I recycled an old 12 V power supply. The sensor delivers a current between 4 mA and 20 mA corresponding to a height of 0 cm to 500 cm.
My tank has only 2 m in height corresponding to 12 mA. Ohm's law helps us to calculate the needed resistor to convert the current into a voltage. The ADC of my microcontroller (Teensy 3.6) tolerates a maximum of 3 V. R = U/I = 3 V/0.012 A = 250 Ω. I used a 220 Ω resistor (1% or better).
Software
To reduce noise we calculate a mean value over e.g. 40 values. We get with the Teensy an ADC value from 0-1023 (10bit), and map the value to our height. Change the values if you use a 12 bit ADC. The following function delivers the level in cm.
unsigned int get_pressure_sensor_cm(byte analog_pin) {
  const byte alen = 40; // less than 255
  static unsigned int v_array[alen] = {0};
  unsigned long long p_sensor_sum = 0;
  unsigned int p_sensor, distance_p_cm;
  p_sensor = analogRead(PIN_PRESSURE_SENSOR);
  if ((p_sensor > 299) && (p_sensor < 901)) {
    for (byte i=1; i<alen; i++) { // rotate array
      v_array[i-1]= v_array[i];
      p_sensor_sum += v_array[i];
    }
    v_array[alen-1] = p_sensor;
    p_sensor_sum += v_array[alen-1];
    p_sensor = round(p_sensor_sum/alen);
    // 4-20mA, 220 Ohm, U*I = 880mV-4400mV (5m), 880mV-2640mV (3m), ADC 300-900
    distance_p_cm = map(p_sensor, 300, 900, 0, 300);
  }
  else {
    distance_p_cm = 0;
  }
  return (distance_p_cm);
}
In the main loop I call the function once a second and publish the result once a minute over MQTT.
Circuit with Teensy 3.6, Ethernet and SD card
I recycled the circuit of an older project that mainly was used to read 5 smartmeter and 5 S0 bus devices. More infos in the archive: https://www.weigu.lu/microcontroller/smartyReader_P1_x5/index.html.
The circuit has a W5500 ethernet breakout board. The Teensy 3.6 has an SD card holder. The new software on https://github.com/weigu1/rainwater_level/Arduino/ reads the 2 sensors, publishes the data (MQTT) and saves the data once a minute to an SD card.
Interesting links
Downloads
