Single board computer projects
Using Docker
last updated: 2026-01-01
Quick links
- Intro
- Install Docker
- Docker commands
- Install docker compose
- Docker compose YAML files
- Manage your container with Portainer
- Interesting links
Intro
Everybody is talking of Docker. As a new OpenHAB version is out, and I have to update my home server. Docker should allow a painless migration because more openHab versions (v2, v3, v4) can run simultaneously. Here I try to document the important steps to get everything running.
A good starting point are the docs.docker.com pages https://docs.docker.com/get-started/overview/ and for openHAB https://www.openhab.org/docs/installation/docker.html.
Install Docker
Install Docker engine on Debian (bookworm)
After an update we download a script and execute it (the version in the repos is outdated). The script will do all the hard work ;).
    sudo apt update && sudo apt upgrade
    curl -sSL https://get.docker.com | sh
Test if Docker is working:
sudo docker run hello-world
Start and stop the Docker service
On Debian (raspios, Ubuntu), the Docker service starts on boot by default. With systemctl we can user the parameter status, stop and start (restart) to test and manipulate the service:
    sudo systemctl status docker
    sudo systemctl stop docker
    sudo systemctl start docker
If Docker does not start at boot we can use systemctl with the parameter enable.
sudo systemctl enable docker
Upgrade Docker
sudo apt upgrade
Uninstall Docker
sudo apt purge docker-ce
To delete all the leftover images, containers, volumes, and other related data:
sudo rm -rf /var/lib/docker
All the edited configuration files must be deleted manually.
Docker as a non-root user
If we want to run a container without sudo we get an error. This is because docker group
is created but no users are added to it. With the following command we add the user, activate it with newgrp and
test docker without sudo.
    sudo usermod -a -G docker $(whoami)
    newgrp docker
    docker run hello-world
Docker commands
All docker commands must be used with sudo if we didn't add a user to the docker group!
List version:
docker version
View container (and get names created by docker):
docker ps -a
View images:
docker images
Get a newer image (update e.g. ubuntu image):
docker image pull ubuntu
Run a container (-i interactive, -t pseudo-terminal, --name name, -h host-name). We can specify a version with a colon. Best to give an own name for the container.
    docker run -it ubuntu`
    docker run -it ubuntu:18.10`
    docker run -it --name myubuntu -h ubuhost ubuntu:18.10`
With run there is always a new container, so use docker start with your container name to run the same container (without -t)!
docker start -i myubuntu
With exec start a second process (second terminal to run e.g. a command) of the same container. We can stop it with Q:
docker exec -it myubuntu /usr/bin/top
Install docker compose
Docker Compose is a tool for defining and running multi-container Docker applications.
If we need more containers (e.g. openHAB, influxDB, Grafana) we will use Docker compose
to call the containers. Docker compose V2 is written in Golang (V1 (docker-compose) was
a Python script and used a hyphen between docker and compose!) and uses a YAML text
file to run the different container. More infos: https://docs.docker.com/compose/ and
https://github.com/docker/compose. After configuring the YAML file Docker compose
allows to create and start all the services with a single command.
Modern Docker installations include Docker Compose as a plugin.
Test the installation.
docker compose version
Docker compose YAML files
Now let's have a look at the following YAML file from https://hub.docker.com/r/openhab/openhab/:
# save as docker-compose.yml or openhab.yml

services:
  openhab:
    image: "openhab/openhab" # latest stable
    container_name: openhab
    restart: always
    network_mode: host
    volumes:
      - "/etc/localtime:/etc/localtime:ro"
      - "/etc/timezone:/etc/timezone:ro"
      - "./openhab/openhab_addons:/openhab/addons"
      - "./openhab/openhab_conf:/openhab/conf"
      - "./openhab/openhab_userdata:/openhab/userdata"
    #devices:
    #  - /dev/ttyACM0:/dev/ttyACM0
    #  - /dev/ttyAMA0:/dev/ttyAMA0
    environment:
      OPENHAB_HTTP_PORT: "9080"
      OPENHAB_HTTPS_PORT: "9443"
      EXTRA_JAVA_OPTS: "-Duser.timezone=Europe/Luxembourg"
We use the network of the host, because openHAB requires UPnP discovery. Unfortunately port mapping is incompatible with this network_mode. Because I use 2 versions of openHAB, I change the ports from 8xxx to 9xxx. The openHAB directories are created from docker-compose.
The two devices lines are only needed if you use an USB Z-Wave stick!
We save the file as text-only with the name openhab.yml and start it with the following command:
docker compose -f openhab.yml up --remove-orphans -d
Without -f and the filename docker-compose searches for a file named docker-compose.yml in the current directory. The option -d stands for detached mode, meaning the container is running in the background (default = foreground).
To stop or (re)start the running container we use:
    docker compose -f openhab.yml stop
    docker compose -f openhab.yml start
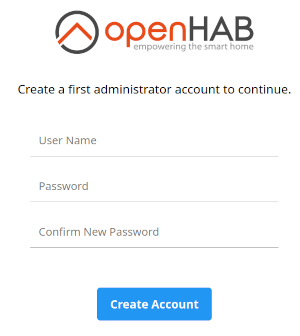
Now you find openHAB on your Raspberry Pi by using the IP address and the port in a browser e.g. 192.168.130.160:9080.

If we want to add an MQTT server (mosquitto), we can add the following service to the yml file:
  mosquitto:
    image: eclipse-mosquitto:latest
    container_name: mosquitto
    restart: always
    network_mode: host
    volumes:
      - "${PWD}/mosquitto/conf:/mosquitto/config/"
      - "${PWD}/mosquitto/data/:/mosquitto/data/"
      - "${PWD}/mosquitto/log/:/mosquitto/log/"
In the /mosquitto/config/ folder we add a textfile named mosquitto.conf
sudo nano mosquitto/conf/mosquitto.conf
with the following content.:
    # Listener
    listener 1883

    # Persitence
    persistence true
    persistence_location /mosquitto/data/

    # Logging
    log_dest file /mosquitto/log/mosquitto.log

    # Security
    #clientid_prefixes xxx
    #allow_anonymous false
    allow_anonymous true

    # Default authentication and topic access control
    #password_file /mosquitto/conf/my_passfile
After rerunning the docker compose command we have a running MQTT server :).
Manage your container with Portainer
Only 2 lines to install it:
    sudo docker pull portainer/portainer-ce:latest
    sudo docker run -d -p 9000:9000 --name=portainer --restart=always -v /var/run/docker.sock:/var/run/docker.sock -v portainer_data:/data portainer/portainer-ce:latest
You find portainer in your browser (IP:9000). Create a user with password. Then click on the docker symbol an your done :).
Interesting links
- https://docs.docker.com/get-started/overview/
- https://docs.docker.com/engine/install/debian/
- https://docs.docker.com/engine/install/linux-postinstall/.
- https://docs.docker.com/engine/reference/run/
- https://docs.docker.com/compose/
- https://hub.docker.com/r/openhab/openhab/
- https://www.openhab.org/docs/installation/docker.html
- https://pimylifeup.com/raspberry-pi-portainer/
